
Summary
- AL auncher is present on Chromebooks, much like the Windows Start Menu, to enable swift app launch and internet search
- To quickly access frequently used apps, use the Shelf to pin them to the bottom of the screen
- Android apps can be downloaded from Google Play Store, Desks supports multitasking, options for setting up, device protection, and usage optimization with Google Assistant
Chromebooks, powered by ChromeOS, are designed to be simple, fast, and user-friendly. It may take a while for new users to feel at ease with the interface and features of the platform. For those unfamiliar with ChromeOS, here are some pointers to help you get started
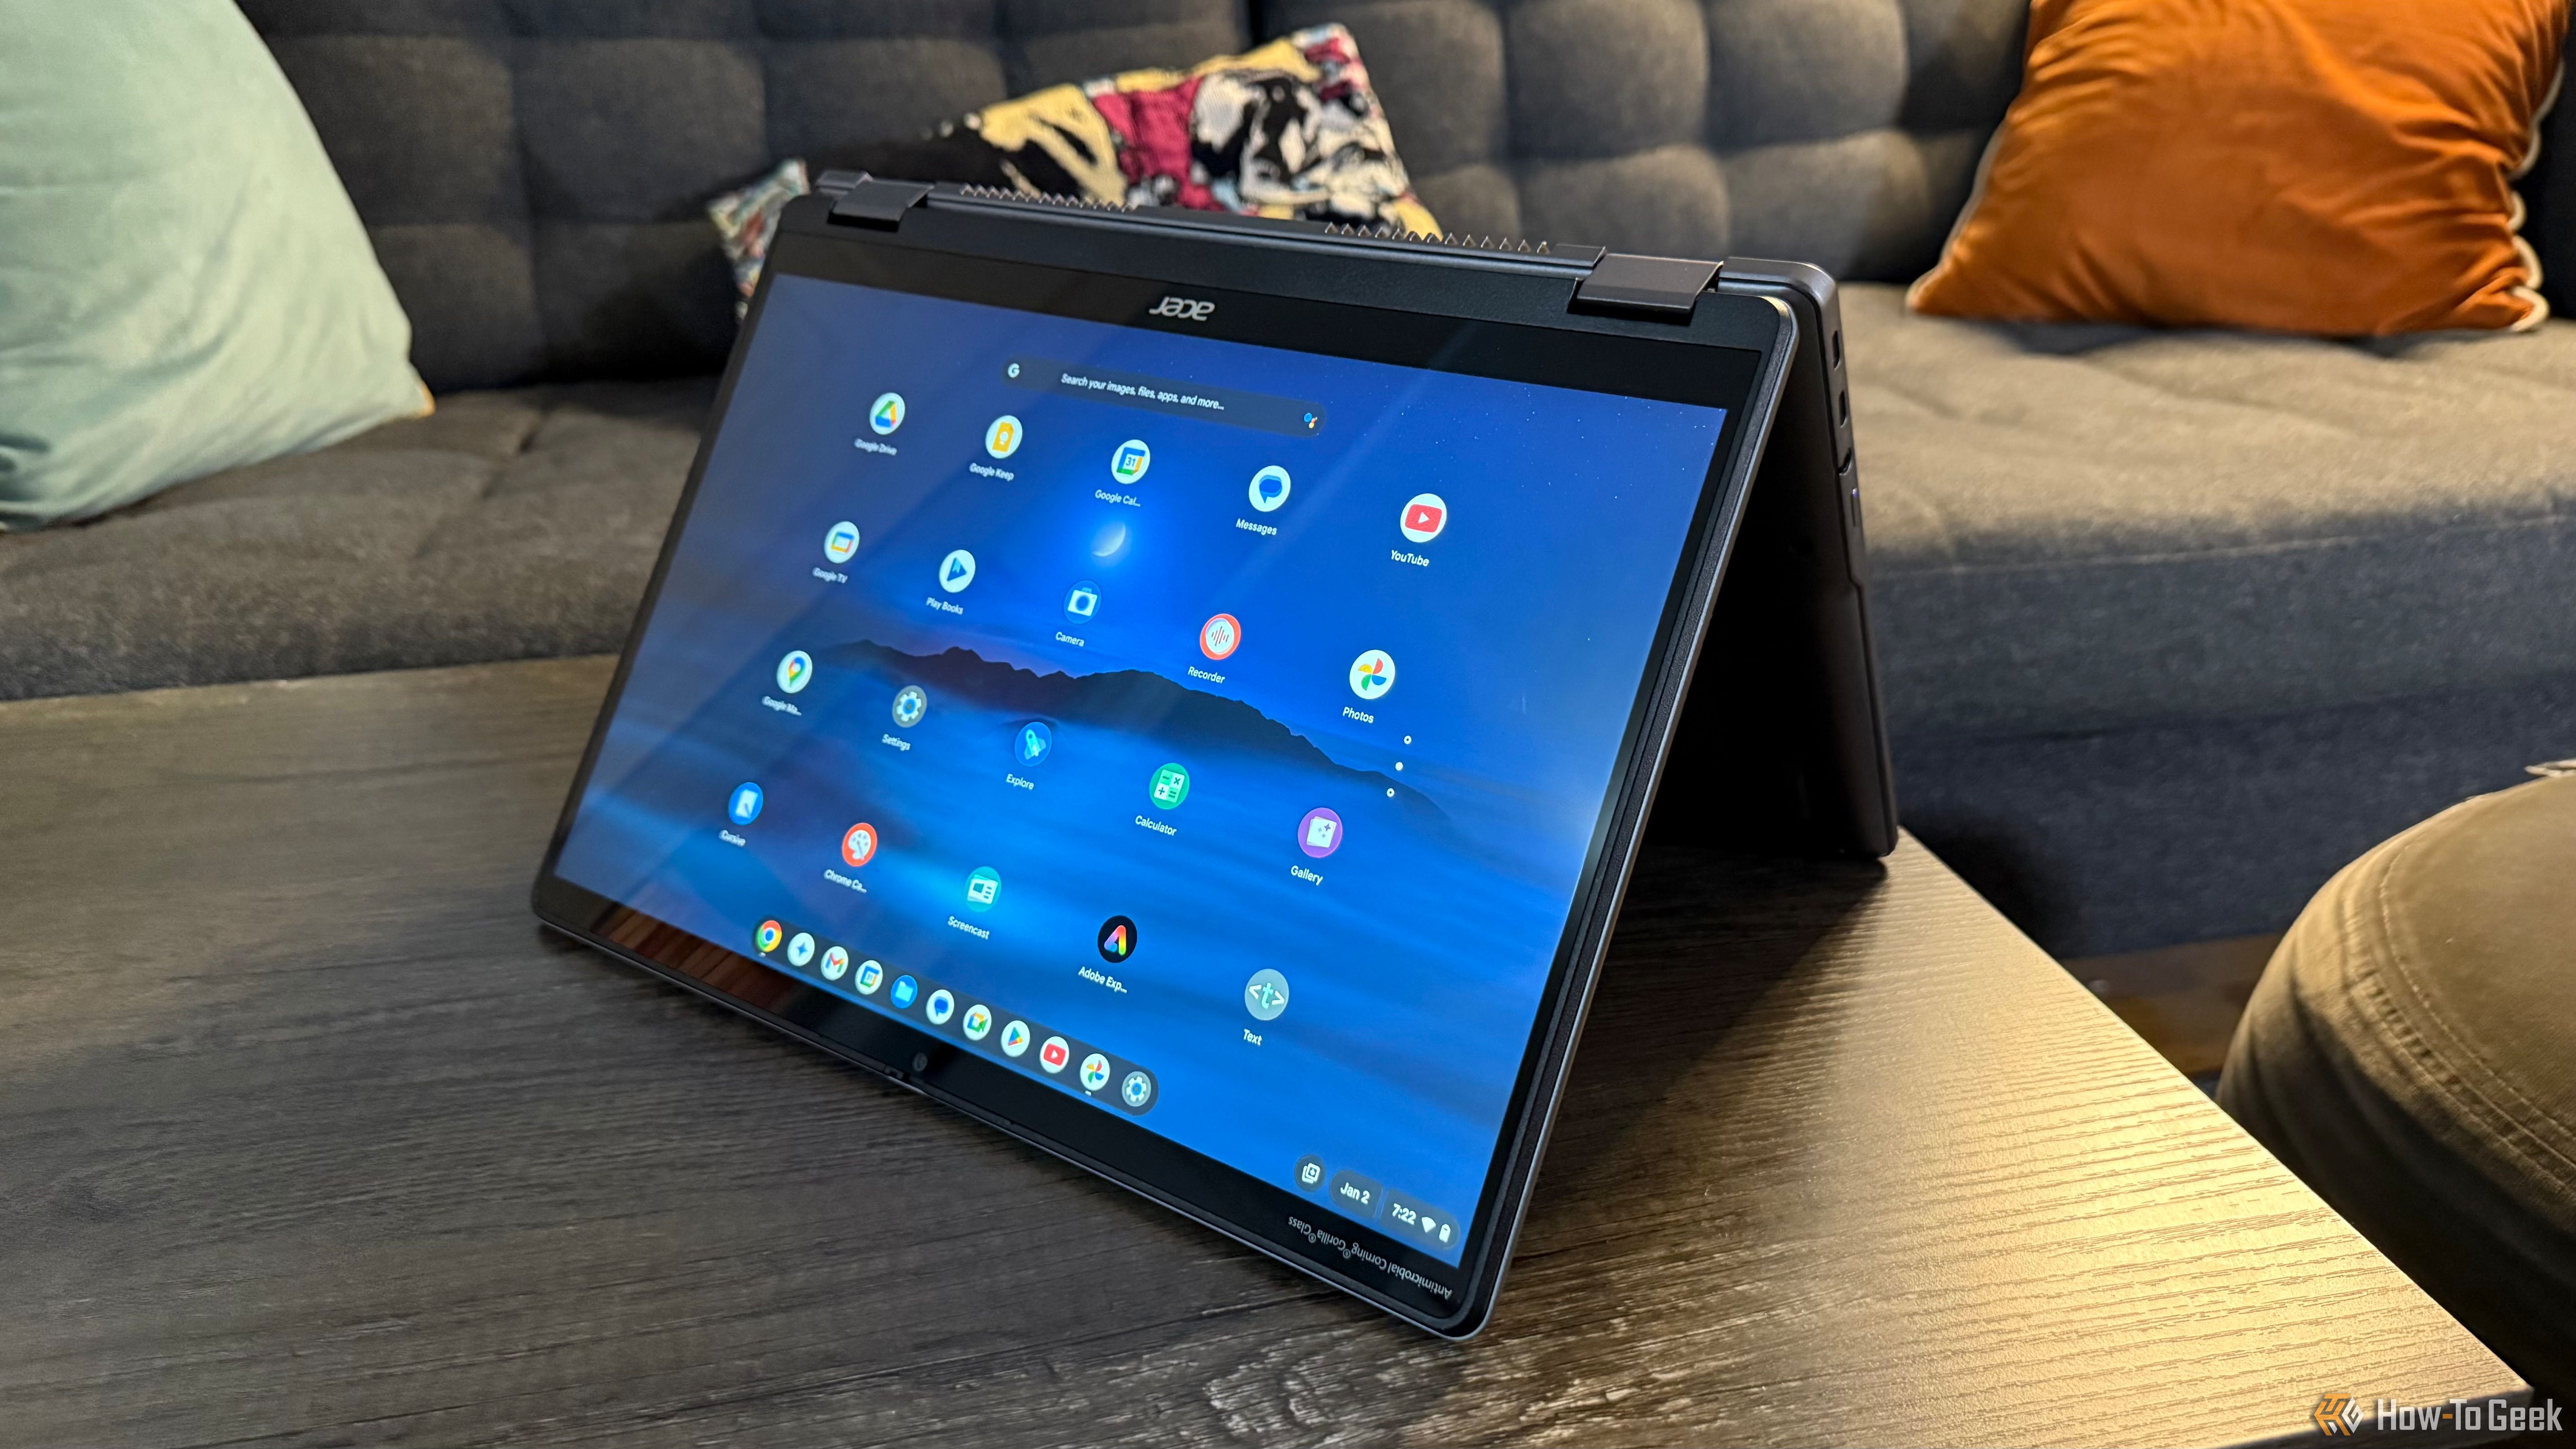
The Start Menu on Chromebooks is The launcher
The Launcher in ChromeOS is akin to the Start menu on Windows. It enables swift access to apps and files while also enabling browsing on the internet without the need for a browser. The Launcher’s ability to gather everything in one location means that you don’t have to go through several menu options, which can be tiresome for someone new to the system
The Launcher can be accessed by clicking on the circle icon at the bottom-left corner of your screen. To do so, you can use the “Search” (or “Launcher”) key on your keyboard

Use the internet to search for an answer and type in your query followed by Enter. Alternatively, you can use voice commands like “OK, Google” to find what you need
Related
The reason I won’t Buy a High-End Chromebook is for this reason
It’s illogical
Quickly access Apps on the Shelf
The Launcher is an useful tool to navigate menus, but it can be time-consuming to open it every time you want to launch an app. This is where the Shelf feature comes in handy. The Shelf is a taskbar-style display that can be found at the bottom of your Chromebook’s screen. With just one click, you can pin your most used apps to a secure location
To Add an app to the Shelf , right-click on the app in the Launcher and select “Pin to Shelf. You can also use drag and drop icons to rearrange them, allowing you to tailor the layout to your workflow. You can pin as many apps as you want, but I like to keep a few important apps on the Shelf so they don’t clutter up

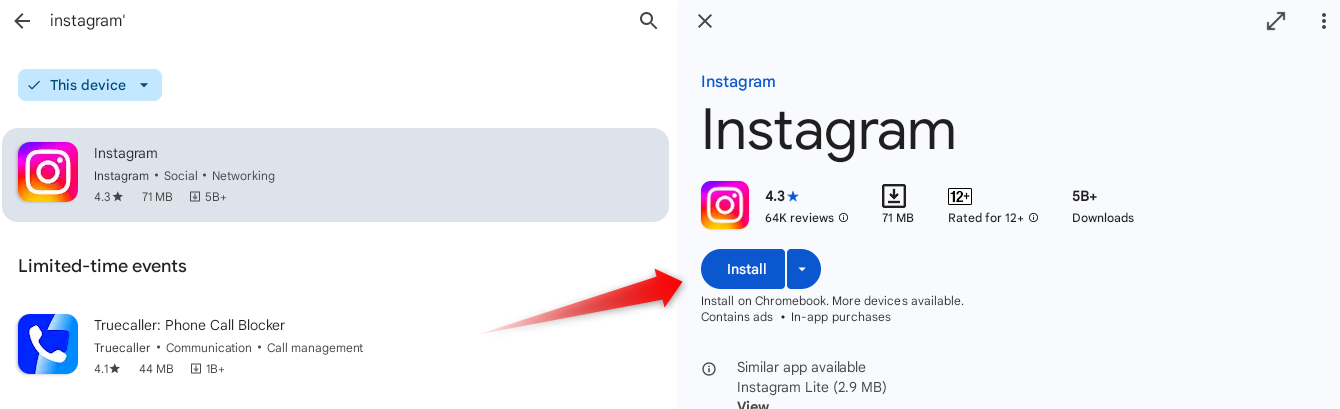
Download Apps from the Google Play Store
ChromeOS, a Google product, shares the same goal as Windows and macOS in that it allows users to download applications from the Google Play Store and Microsoft Store. You can now run Android apps on your device and access the majority of commonly used applications on an Android smartphone
To install an app on your Chromebook, simply launch the Google Play Store from the Launcher or Shelf, type in the desired app, and click” Install “. After the app is downloaded, it will be in your Launcher. Select the app you want to uninstall from the Launcher by right-clicking its icon and choosing” Uninstall “.”
Multitask Using Virtual Desktops
ChromeOS allows you to Use virtual desktops , known as “Desks” to facilitate multitasking and help you keep your workspace organized. Each desk can host its own set of open windows and apps, so you can have one for work with emails, documents, and meetings, another for personal tasks like social media or streaming apps, and more for other activities
To create a new desk, press Search+Shift+’ + ‘or click “New Desk.” To remove the current desk, press Search+Shift+’ – ‘or click the close icon. You can switch between desks by pressing Search+ [or Search+] to move left or right or swipe left or right with four fingers. Additionally, you can move apps by dragging them from one desk to another

Capture Screenshots and Record Screens
ChromeOS includes built-in tools for Taking screenshots And Recording your screen So you won’t need third-party apps. To capture the entire screen, press Ctrl+Show Windows. To record a specific area, use Ctrl+Shift+Show Windows. If your device has a touchscreen, the Stylus tools allow you to select and capture regions precisely
Recording your screen is also straightforward. Press Ctrl+Alt+Show Windows to open the Screen Capture toolbar, then click the video camera icon to start recording. You can record the entire screen, a specific window, or a custom area. When you’re done, click the stop button in the bottom-right corner
Both screenshots and recordings are automatically saved to the Downloads folder, though you can change the save location if needed
Secure Your Chromebook
While ChromeOS is a pretty secure OS, you can take a few additional steps to Improve your device’s security First, you must enable two-factor authentication, which adds an extra layer of protection by requiring a second form of identification when logging in. You have to enable 2FA for the Google account linked to your device
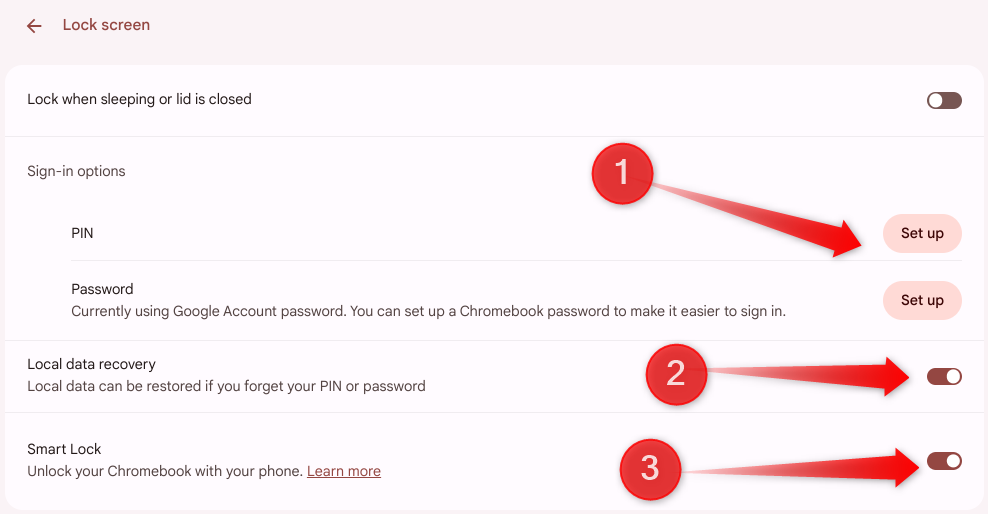
Next, navigate to Settings> Privacy and Security> Lock Screen to set up a screen lock using a PIN or password. You can also enable the “Local Data Recovery” toggle to restore your local data if you forget your PIN or password and activate “Smart Lock” to unlock your device with your smartphone
Customize Settings to Your Preference
ChromeOS offers various customization options that allow you to tailor the system. You can change the wallpaper and adjust the screen resolution, orientation, and size. You can Move the Shelf to the left or right, resize it, or set it to auto-hide You can also remap keyboard keys to perform functions different from their default assignments
You can also adjust notification settings for your apps and change the default language if needed. Likewise, accessibility features like text-to-speech and magnifiers can improve your experience. That’s why you should take the time to explore and adjust these settings to match your preferences
Use Google Assistant Smartly
Google Assistant is integrated into Chromebooks, allowing you to perform tasks hands-free like on your smartphone. You can use it to set reminders, control smart home devices, ask questions, search on the web, schedule appointments in Google Calendar, translate text, take notes, and navigate the operating system
Not only does Google Assistant make tasks more convenient by reducing the need for manual input, but it also boosts productivity by enabling you to get things done without disrupting your workflow. To Use Google Assistant , activate it by saying “Hey Google” or “Ok Google” or press the Search+A keyboard shortcut. Then, request the action you want it to perform

ChromeOS offers all the key features needed for effective browsing, working, or studying. The tips above should have helped you get familiar with ChromeOS, making it easier to navigate your Chromebook and take full advantage of its features. While these tips will help you begin, don’t forget to Uncover even more lesser-known features within ChromeOS